We understand that flossing can sometimes be overlooked or seen as a hassle, but we’re here to help! In our step-by-step guide on “How to floss properly,” we aim to provide simple and effective instructions on incorporating this essential oral hygiene habit into your daily routine. By following our guide, you’ll learn the importance of flossing and how it can significantly improve your dental health. Let’s embark on this journey towards a healthier smile together!
Maintaining Oral Health with Regular Flossing
Choose the right floss
To choose the right floss for your oral health needs, follow these simple steps:
- Consider the type of floss that works best for you. There are various options available, including:
- Waxed floss: This type of floss slides easily between teeth and is less likely to shred.
- Unwaxed floss: If you have closely spaced teeth, this thinner floss may be more suitable as it can fit into tight spaces.
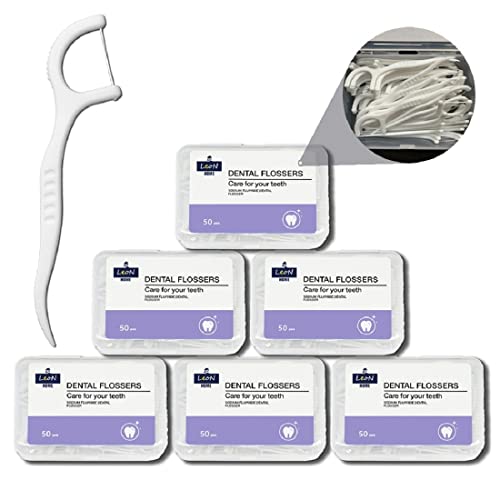
- Floss picks: These handy tools have a short strand of floss attached to a handle, making it easier to reach the back teeth.
- Floss threaders: If you wear braces or have dental work like bridges or implants, using a floss threader can help you navigate the floss around these areas.
- Think about your personal preference and dexterity. Some people find waxed floss more comfortable to use, while others may prefer the convenience of floss picks. Consider what feels most comfortable and convenient for you.
- Consult with your dentist or dental hygienist. They can offer guidance based on your specific oral health needs. They may recommend a particular type of floss or provide additional tips for effective flossing.
Remember, regular flossing is crucial for maintaining good oral hygiene and preventing gum disease. By choosing the right floss for your needs, you can make this essential habit more effective and enjoyable.
Measure the floss
To measure the floss, begin by taking approximately 18 inches (45 cm) of floss from the container. Next, wrap most of the floss around your middle fingers, leaving about 1-2 inches (2-5 cm) free to use for cleaning between your teeth. Ensure that the floss is securely wrapped around your fingers, allowing for a firm grip as you maneuver it during flossing.
Hold the floss correctly
To hold the floss correctly, follow these steps:
- Place the floss tightly between your thumbs and index fingers.
- Leave a small section of the floss in between your fingers for flossing.
- Make sure to hold the floss firmly, but not too tight, to ensure effective cleaning.
Remember to maintain a gentle grip while using the floss to prevent any discomfort or injury to your gums.
Insert the floss gently
- Guide the floss between your teeth by using a gentle back-and-forth motion.
- Avoid snapping the floss into your gums as this can cause irritation and discomfort.
- Make sure to insert the floss gently and smoothly between each pair of teeth, ensuring it reaches the gum line.
- Remember to take your time and be gentle to avoid any potential harm or discomfort.
Curve the floss
To properly curve the floss and ensure thorough cleaning, follow these steps:
- Take a length of floss, approximately 18 inches, and wrap it around your middle fingers, leaving about 2 inches of floss in between.
- Hold the floss tightly between your thumbs and index fingers, creating a C shape.
- Gently slide the floss up and down against the side of each tooth, making sure to reach below the gumline.
- As you move from one tooth to the next, use a clean section of floss each time to avoid spreading bacteria.
- Repeat this process for every tooth, making sure to clean both sides of each tooth.
- Be cautious not to snap the floss into your gums, as this can cause irritation or bleeding.
Remember, curving the floss properly will help remove plaque and food particles effectively, promoting good oral hygiene.
Clean the gumline
To clean the gumline, start by taking a piece of dental floss and gently sliding it up and down along the side of each tooth. Make sure to clean the area where the tooth meets the gumline using a back-and-forth motion. Here’s an example:
- Take about 18 inches of floss and wrap it around your middle fingers, leaving a few inches in between.
- Hold the floss tightly between your thumbs and index fingers.
- Gently slide the floss between your teeth using a sawing motion.
- Curve the floss into a C-shape around each tooth and move it up and down, making sure to go beneath the gumline.
- Repeat this process for each tooth, using a fresh section of floss each time.
Remember, it’s important to be gentle while cleaning the gumline to avoid injuring your gums.
Be thorough
To be thorough in your flossing routine, take your time to floss every tooth, including the ones at the back of your mouth. Start by holding the floss tightly between your fingers and gently guide it between each tooth. Be sure to pay attention to both sides of each tooth, moving the floss up and down to remove any trapped food particles or plaque. By being diligent and meticulous in your flossing technique, you can ensure optimal oral hygiene and prevent any potential dental issues.
Rinse and discard
After you have finished flossing, it is important to rinse your mouth with either water or mouthwash. This will help remove any remaining debris and residue from between your teeth and gums. Once you have rinsed, make sure to discard the used floss in a trash can to maintain good hygiene and prevent any potential contamination.
Floss daily
Flossing daily is an essential step to ensure healthy gums and prevent dental problems. To incorporate flossing into your daily oral hygiene routine, start by taking a piece of dental floss around 18 inches long. Gently guide the floss between your teeth using a back-and-forth motion, making sure to curve it around the base of each tooth. Repeat this process for each tooth, using a fresh section of floss each time. Remember to be gentle to avoid injuring your gums, and make flossing a regular habit for optimal oral health.
Achieving a Healthier Smile
In conclusion, we have explored the essential steps to floss properly and emphasized the significance of this technique for maintaining optimal oral health. By following our guide, you can effectively remove plaque and food particles, reducing the risk of gum disease, cavities, and bad breath. Remember, flossing is an integral part of your oral hygiene routine that should be done daily. So, let’s prioritize our dental health and make proper flossing a habit for a brighter smile and healthier gums. Happy flossing!
Mastering the Technique
Mastering the art of flossing for a healthier smile
- Start by choosing the right type of floss: There are various options available, such as waxed, unwaxed, or flavored floss. Choose one that you find comfortable and easy to use
- Cut an appropriate length of floss: Typically, a piece of floss measuring around 18 inches (45 cm) should be sufficient. You can adjust the length based on your preference and comfort
- Hold the floss correctly: Wrap the ends of the floss around your middle fingers, leaving a small portion of floss to work with. Use your thumb and index finger to guide the floss between your teeth
- Gently glide the floss between your teeth: Slide the floss up and down in a gentle sawing motion, making sure to reach the gumline. Be careful not to snap or force the floss, as it may cause injury to your gums
- Curve the floss around each tooth: Form a C-shape with the floss around the base of each tooth and gently move it back and forth to remove plaque and debris. Make sure to floss both sides of each tooth, including the back teeth
- Use a clean section of floss for each tooth: As you move to the next tooth, use a fresh section of floss to ensure effective cleaning. Reusing the same section may transfer bacteria and debris
- Rinse and dispose of the floss: After flossing, rinse your mouth with water to remove any remaining particles. Wrap the used floss around your fingers and discard it in a trash can. Avoid flushing floss down the toilet as it can cause plumbing issues
- Remember, flossing should be done gently and without causing discomfort or pain. If you experience bleeding or sore gums, consult with a dentist or dental professional for further guidance
The Importance of Flossing Daily: Frequently Asked Questions
Do you have any questions about the frequency with which you should replace your dental floss?
We understand that you may have questions about the frequency at which you should replace your dental floss. It’s important to note that the recommended time frame for replacing dental floss varies depending on the type of floss you use and your individual oral health needs.
In general, dental professionals suggest replacing floss every day or after each use to maintain optimal oral hygiene. However, if you are using a thicker or waxed floss, it may be more durable and can be replaced every few days. On the other hand, thinner floss or floss made of nylon or silk may require daily replacement.
To determine the best frequency for replacing your dental floss, we recommend consulting with your dentist or dental hygienist. They can evaluate your oral health condition and provide personalized advice based on your needs. Additionally, they may also suggest using floss picks or interdental brushes as alternatives, which can have different replacement guidelines.
Remember, regular flossing, regardless of the replacement frequency, is essential for maintaining good oral health. If you have any concerns or further questions, don’t hesitate to reach out to your dental professional.
Are you aware of the benefits of flossing daily?
Yes, we are aware of the benefits of flossing daily. Flossing helps remove plaque and food particles from between teeth and along the gumline, where a toothbrush cannot reach effectively. By doing so, it can help prevent cavities, gum disease, and bad breath. Regular flossing also promotes healthier gums and can contribute to overall oral health.


