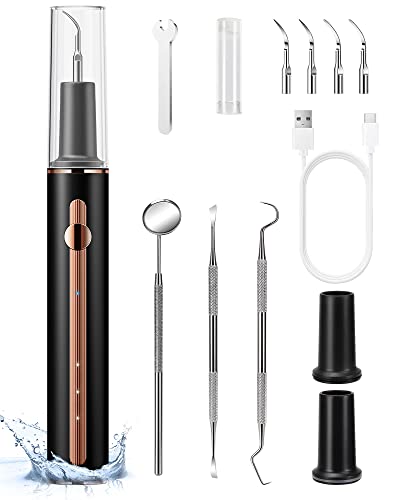
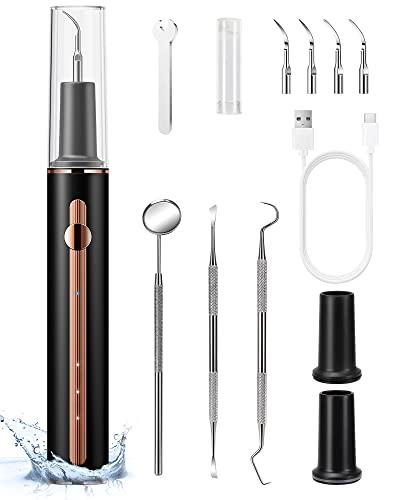
We understand that maintaining and cleaning an ultrasonic dental tool can be a daunting task, but we’re here to help. In this step-by-step guide, we will provide you with the necessary information and guidance to ensure that your ultrasonic dental tool remains in excellent condition.
Effortlessly achieve your dental hygiene goals
Step 1: Gather the necessary materials
To gather the necessary materials for cleaning and maintaining the ultrasonic dental tool, first, find a soft cloth to wipe down the tool. Next, grab a brush with soft bristles, which will be used to clean hard-to-reach areas. Don’t forget to pick up a cleaning solution recommended by the manufacturer, as this will help remove any debris or buildup. Lastly, remember to wear protective gloves to keep your hands safe during the cleaning process.
Step 2: Power off the device
To ensure safety during the cleaning process, it is crucial to power off the ultrasonic dental tool and disconnect it from the power source. This step helps to prevent any accidental activation of the tool while cleaning. Simply locate the power switch of the device and turn it off. Then, unplug the tool from the power source to ensure complete disconnection.
Step 3: Wipe the exterior
To properly wipe the exterior of the ultrasonic dental tool, follow these steps:
- Get a soft cloth – Find a clean, lint-free cloth that is gentle on the device’s surface.
- Apply gentle pressure – Using the cloth, softly wipe the exterior surfaces of the dental tool. Ensure that you cover all areas to remove any visible dirt or debris.
- Avoid abrasive materials – Remember to avoid using any abrasive materials, such as rough sponges or harsh chemicals, as they can scratch or damage the device.
By following these instructions, you can effectively clean the exterior of the ultrasonic dental tool, keeping it in good condition for optimal use.
Step 4: Clean the handpiece
To clean the handpiece, begin by detaching it from the main unit. Follow the manufacturer’s instructions to properly clean it. Here’s what you need to do:
- Prepare the cleaning solution recommended by the manufacturer. For example, mix 1 part cleaning solution with 10 parts water.
- Dip the brush with soft bristles into the cleaning solution.
- Gently scrub all surfaces of the handpiece, including the exterior and interior parts. Pay special attention to areas that may accumulate debris or buildup.
- Rinse the handpiece thoroughly with clean water to remove any remaining cleaning solution.
- Allow the handpiece to air dry completely before reattaching it to the main unit.
Remember to always follow the manufacturer’s instructions for cleaning your specific handpiece model, as different models may have unique cleaning requirements.
Step 5: Clean the tips or inserts
To clean the tips or inserts, remove them from the handpiece and clean them separately. Use a recommended cleaning solution and a brush with soft bristles to gently remove any debris or buildup. Rinse the tips thoroughly under running water to ensure all cleaning solution is removed, and then pat them dry with a clean towel or allow them to air dry. Make sure the tips are completely dry before reattaching them to the handpiece.
Step 6: Clean the water reservoir
- Empty the water reservoir of the ultrasonic dental tool.
- Clean the reservoir using a recommended cleaning solution, following the manufacturer’s instructions for proper cleaning and rinsing.
- After cleaning, refill the reservoir with fresh water for continued use.
Step 7: Reassemble and test
Reassemble all the components of the ultrasonic dental tool by aligning them properly and securely attaching them. For example, ensure that the handpiece is securely connected to the control unit and that the tips are properly inserted. Once reassembled, perform a test run before using the device. Turn on the power and activate the ultrasonic function to check if it is functioning correctly. Adjust the settings as needed to ensure optimum performance.
Step 8: Regular maintenance
To maintain the ultrasonic dental tool, follow a regular maintenance schedule provided by the manufacturer. Clean the tool regularly, paying special attention to the nozzles and tips. Lubricate any moving parts as recommended by the manufacturer. Inspect the tool periodically for signs of wear or damage, and promptly address any issues that are identified. This will help ensure the longevity and optimal performance of the ultrasonic dental tool.
Wrapping up the cleaning process
In conclusion, we understand that maintaining and cleaning an ultrasonic dental tool can be a daunting task. However, we cannot stress enough the importance of doing so. By taking the time to properly care for your tool, you are not only ensuring its longevity but also maximizing its performance. Remember to follow the step-by-step instructions and consult the manufacturer’s guidelines to achieve the best results. With a little effort and dedication, you can keep your ultrasonic dental tool in excellent condition and provide effective dental care to your patients.
Essential Equipment
Mastering Ultrasonic Tool Care
Understanding the Proper Usage of Ultrasonic Dental Tools
- Familiarize yourself with the tool: Take the time to read the user manual and understand the different parts of the ultrasonic dental tool, such as the handpiece, tips, controls, and settings
- Wear appropriate protective gear: Before using the tool, make sure to wear personal protective equipment (PPE) such as gloves, mask, and safety glasses to ensure your safety and the safety of your patients
- Proper hand positioning: Hold the handpiece with a relaxed and comfortable grip, positioning your fingers away from the vibrating tip. This will help maintain control and prevent hand fatigue during use
- Choose the right tip: Select the appropriate tip based on the procedure you are performing. Different tips are designed for specific tasks such as scaling, debridement, or root planing. Ensure that the tip is securely attached to the handpiece before use
- Start with low power settings: Begin with low power settings and gradually increase as needed. This will allow you to get accustomed to the tool’s vibrations and prevent any discomfort for both you and the patient
- Remember, practice and experience are key to becoming proficient with ultrasonic dental tools. It’s important to always prioritize patient comfort and safety during the procedure. If you have any further questions or concerns, don’t hesitate to reach out to your dental mentor or supervisor for guidance
Common Questions About Ultrasonic Dental Tools
Are ultrasonic dental tools suitable for pediatric patients or individuals with dental anxiety?
Yes, ultrasonic dental tools can be suitable for pediatric patients and individuals with dental anxiety. These tools use high-frequency vibrations to remove plaque and tartar from teeth, making the cleaning process faster and more comfortable. They are gentler on the teeth and gums compared to traditional dental tools, which can make them particularly beneficial for patients who may be anxious or have sensitive teeth. Additionally, the noise and sensation produced by ultrasonic tools are often less intimidating for pediatric patients, helping to reduce their anxiety during dental procedures. However, it is important to consult with a dental professional who can evaluate the specific needs and preferences of each patient to determine the best course of treatment.
Do ultrasonic dental tools have any advantages over traditional hand instruments in terms of efficiency and efficacy?
Yes, ultrasonic dental tools do have several advantages over traditional hand instruments in terms of efficiency and efficacy.
Firstly, ultrasonic tools are much faster and more efficient in removing plaque, calculus, and stain deposits from teeth. The high-frequency vibrations emitted by these tools help to break down the hard deposits, making the cleaning process quicker and more thorough. This saves both the dentist’s and the patient’s time.
Moreover, the ultrasonic technology allows for better access to hard-to-reach areas, such as deep periodontal pockets or narrow spaces between teeth. The precision and effectiveness of ultrasonic scalers enable us to clean these areas more effectively, reducing the risk of future dental problems.
Additionally, ultrasonic tools are gentle on the teeth and gums, minimizing discomfort during the cleaning procedure. The vibrations of the tool help to dislodge debris without causing excessive pressure or trauma to the oral tissues. This is especially beneficial for patients with sensitive gums or those prone to gum recession.
Furthermore, ultrasonic instruments can also be used for other dental procedures, such as root canal treatment or implant placement. The versatility of these tools allows us to perform a wider range of procedures, enhancing the overall efficacy of our dental practice.
Overall, the use of ultrasonic dental tools provides significant advantages in terms of efficiency and efficacy. They offer faster, more thorough cleaning, better access to hard-to-reach areas, and increased patient comfort. As dental professionals, we constantly strive to provide the best treatment options for our patients, and ultrasonic tools have proven to be highly beneficial in achieving optimal oral health.
Can ultrasonic dental tools be used for routine dental cleanings or are they only reserved for more complex cases?
Ultrasonic dental tools can indeed be used for routine dental cleanings. They are not solely reserved for more complex cases. These tools utilize high-frequency vibrations to help remove plaque, tartar, and other debris from the teeth and gums. The ultrasonic vibrations are gentle yet effective in breaking down and removing stubborn deposits. They can be particularly useful for people with extensive plaque buildup or those who have difficulty with traditional cleaning methods. However, it is important to note that not all dental offices may offer ultrasonic cleanings, so it’s best to consult with your dentist to determine if this option is available to you.


