In this step-by-step guide, we will explore how to incorporate a water flosser into your daily oral hygiene routine. As dental professionals, we understand that maintaining good oral health can sometimes be challenging. That’s why we want to help you make the most of your oral care routine by introducing you to the benefits of a water flosser. We will provide easy-to-follow instructions and tips on how to effectively use a water flosser, ensuring that you can achieve optimal oral hygiene and keep your smile healthy and beautiful.
Upgrade your oral hygiene routine
Understanding the benefits of using a water flosser
Incorporating a water flosser into your daily oral hygiene routine can greatly benefit your overall dental health. By using a water flosser, you can effectively remove plaque and debris that may be missed by traditional flossing methods. This can help prevent the buildup of plaque, reducing the risk of cavities and gum disease. Additionally, the pulsating water stream from a water flosser can stimulate blood flow and promote gum health, leading to stronger and healthier gums. To experience these benefits, simply fill the water reservoir, select the desired pressure setting, aim the tip at the gum line, and gently guide the flosser along your teeth, making sure to reach all the spaces between them.
Choosing the right water flosser
When it comes to selecting a water flosser, it’s important to consider the different types available in the market. Here are the key features of each type to help you find the one that suits your needs:
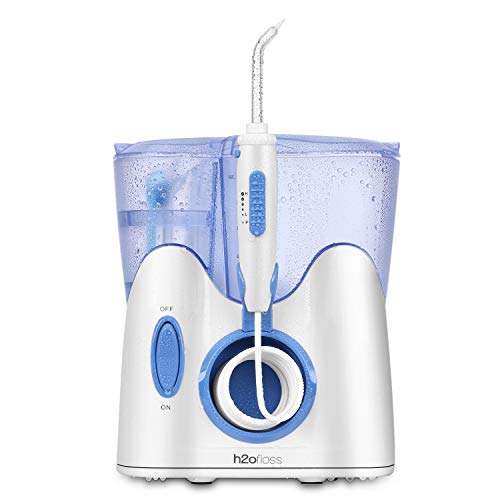
- Countertop Water Flossers: These are the traditional water flossers that sit on your countertop and require a power source. They offer a wide range of features, such as adjustable pressure settings, multiple tips for different needs, and large water reservoirs that minimize the need for refills.
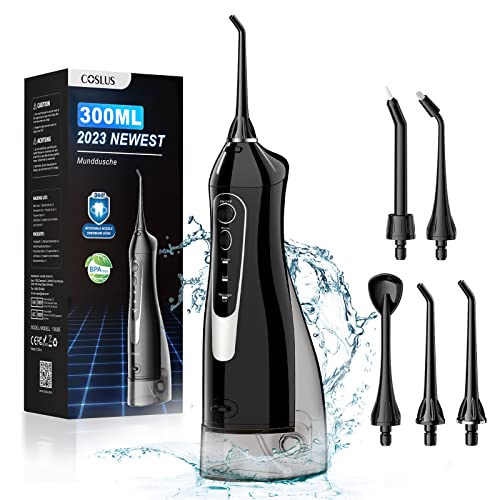
- Cordless Water Flossers: If portability is a priority, cordless water flossers are a great option. They are battery-powered and don’t need a power source, allowing you to use them anywhere. While they may have smaller water reservoirs and fewer pressure settings compared to countertop models, they are convenient for travel or smaller bathrooms.
- Combination Water Flossers: These versatile flossers offer the best of both worlds. They can be used both as countertop and cordless models, giving you flexibility in how you use them. Combination water flossers usually come with rechargeable batteries and offer a good balance between features and portability.
When choosing a water flosser, consider your specific needs and preferences. Here are a few factors to keep in mind:
- Pressure Settings: Look for a flosser that offers adjustable pressure settings. This allows you to customize the water pressure according to your comfort level and dental needs.
- Water Reservoir Capacity: Consider the size of the water reservoir. Larger reservoirs mean less frequent refills, but keep in mind that this may also affect the flosser’s portability.
- Tip Compatibility: Check if the flosser comes with different types of tips for specific purposes, such as orthodontic or periodontal needs. Having a variety of tips allows you to address different dental concerns effectively.
- Ease of Use and Maintenance: Look for flossers that are easy to use and clean. Features like intuitive controls, ergonomic design, and removable parts for easy cleaning can enhance your overall experience.
By considering these factors, you’ll be able to choose the right water flosser that meets your oral hygiene needs. Remember, regular flossing, whether using traditional floss or a water flosser, plays a crucial role in maintaining healthy gums and preventing dental issues.
Preparing the water flosser
To set up the water flosser before using it, follow these steps. First, fill the water reservoir with warm water up to the marked fill line. Next, choose the appropriate tip for your needs and attach it securely to the handle of the flosser. Finally, adjust the pressure settings according to your preference by using the control button or dial. Make sure to start with a lower pressure setting and gradually increase it if needed. By following these simple steps, you can ensure that your water flosser is ready for effective and comfortable use.
Proper technique for using a water flosser
To use a water flosser properly, hold it securely in your hand, making sure your grip is comfortable. Position the tip of the flosser against your gumline at a 90-degree angle, with the water jet facing the teeth. Slowly move the flosser along the gumline and between each tooth, pausing briefly at each spot to allow the water to remove plaque and debris. Remember to target all areas of your mouth, including the front, back, and sides of each tooth, for a thorough clean.
Adjusting the pressure settings
To adjust the pressure settings on your water flosser for personal comfort and sensitivity, start by turning it on and placing the tip in your mouth. Gradually increase the pressure until you feel a comfortable and effective cleaning sensation. Be mindful of any discomfort or sensitivity, and if needed, decrease the pressure slightly. It’s important to find the right balance between effective cleaning and avoiding any discomfort, so take your time and adjust the pressure settings accordingly.
Incorporating the water flosser into your daily routine
To incorporate the use of a water flosser into your daily oral hygiene routine, begin by selecting a suitable time of day that works best for you. We recommend using the water flosser after brushing your teeth, either in the morning or before bedtime. Fill the reservoir with warm water and adjust the pressure setting to a comfortable level. Hold the flosser tip close to your teeth and gums, aiming at the gumline, and activate the device. Move the flosser along each tooth, making sure to spend extra time on areas that require special attention. Repeat this process at least once a day to achieve optimal results. Remember to clean the flosser thoroughly after each use to maintain its effectiveness.
Cleaning and maintenance
To clean and maintain your water flosser for longevity and effectiveness, follow these steps:
- Regularly clean the reservoir: After each use, remove the reservoir and rinse it thoroughly with warm water. Use a mild detergent to remove any buildup or residue, and make sure to rinse it well before reattaching it to the flosser.
- Replace the tip: Over time, the flosser tip may become worn or ineffective. To ensure optimal performance, replace the tip every three to six months or as recommended by the manufacturer. Simply detach the old tip and attach a new one securely.
- Store the device properly: When not in use, it’s important to store your water flosser in a clean, dry place. Avoid exposing it to extreme temperatures or direct sunlight, as this can damage the device. Additionally, make sure to empty the reservoir completely to prevent mold or bacteria growth.
By following these simple cleaning and maintenance tips, you can ensure that your water flosser remains in good condition, providing you with effective and hygienic oral care for years to come.
Troubleshooting common issues
Identify common problems that users may encounter while using a water flosser and provide troubleshooting tips to resolve them.
- Low water pressure: If you notice that your water flosser is not producing enough pressure, first check if the water tank is filled properly. If it is, try cleaning the water nozzle to remove any debris or buildup. If the problem persists, check the water pressure settings on the device and adjust them accordingly.
- Clogging: If you experience clogging in your water flosser, start by emptying the water tank and rinsing it thoroughly. Then, remove the nozzle and clean it with a soft brush. If the clog persists, try using a mixture of warm water and vinegar to soak the nozzle for a few minutes before rinsing again. If needed, use a toothpick or needle to gently unclog the water flosser nozzle.
Remember to always refer to the user manual that came with your water flosser for specific troubleshooting instructions related to your device.
Seeking professional advice
Consult your dentist or dental hygienist for personalized guidance on incorporating a water flosser into your oral hygiene routine. They can assess your specific oral health needs and recommend the most suitable flossing technique, frequency, and water pressure settings. Seeking professional advice is crucial as it ensures that you are using the water flosser effectively and safely, maximizing its benefits for your oral health.
Enhancing your oral care routine
In conclusion, incorporating a water flosser into our daily oral hygiene routine can bring numerous benefits to our overall dental health. Throughout this guide, we have explored the advantages of using a water flosser, such as its ability to remove plaque, reduce gum inflammation, and enhance our smile. We have also provided steps to seamlessly integrate this device into our daily routine. By setting a specific time, starting with low pressure, and gradually increasing the intensity, we can ensure that we effectively clean our teeth and gums without causing any discomfort. Remember, consistency is key when it comes to oral hygiene, and incorporating a water flosser can greatly contribute to our long-term dental well-being. So, let’s take that step and give our smiles the care they deserve.
Simple and Effective Tips
Step-by-Step Guide to Using Water Flossers
- Fill the reservoir: Start by filling the water flosser’s reservoir with lukewarm water. Make sure you follow the manufacturer’s instructions for the recommended water level
- Adjust the pressure: Most water flossers come with adjustable pressure settings. As a beginner, it’s best to start with a lower pressure setting to avoid any discomfort or sensitivity. Gradually increase the pressure as you become more comfortable
- Aim at a 90-degree angle: Position the water flosser’s tip at a 90-degree angle to your gumline. This allows the water to effectively clean between your teeth and along the gumline. Move the tip along each tooth, pausing briefly between each one
- Start with the back teeth: Begin at the back of your mouth and work your way forward, targeting both the front and back surfaces of your teeth. Pay special attention to the areas where your teeth and gums meet, as these are prone to plaque buildup
- Be patient and thorough: Take your time to thoroughly clean each tooth, spending a few seconds on each one. Make sure to floss all areas, including the spaces between your teeth and around any dental work like braces or implants
- Remember, practice makes perfect! Using a water flosser may feel a bit different at first, but with time, you’ll get more comfortable and proficient in using it. Don’t hesitate to consult your dentist or dental hygienist for further guidance on how to use a water flosser effectively


