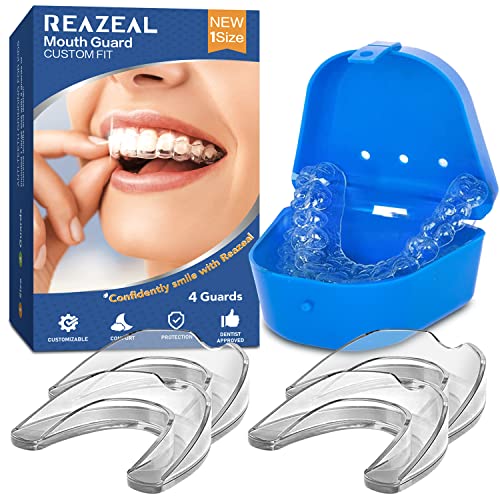
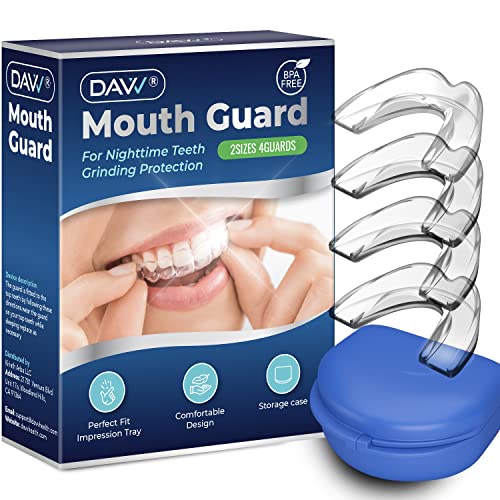
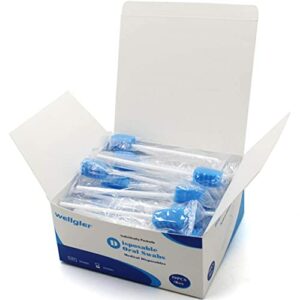
We understand that dealing with teeth grinding can be a challenge, and taking care of your nightguard is an important part of managing this condition. In our step-by-step guide titled “How to clean a nightguard for teeth grinding,” we provide you with easy-to-follow instructions on how to properly clean and maintain your nightguard. By following these steps, you can ensure that your nightguard remains effective and comfortable, helping you find relief from teeth grinding.
Protect your teeth while you sleep
Gather supplies
To gather the necessary supplies, follow these steps:
- Collect a soft-bristle toothbrush: Look for a toothbrush with bristles that are gentle on your gums and teeth. Avoid using a hard-bristle toothbrush, as it can cause damage to your dentures.
- Obtain non-abrasive denture cleaner: Choose a denture cleaner that is specifically designed for cleaning dentures. Avoid using regular toothpaste or any abrasive substances that may scratch or damage the surface of your dentures.
- Find a small bowl: Look for a small bowl that is large enough to accommodate your dentures. A shallow bowl works best for this purpose. It should be clean and free from any residue or contaminants.
- Prepare lukewarm water: Fill the small bowl with lukewarm water. Lukewarm water is ideal for cleaning dentures as it helps to loosen any debris without damaging the denture material. Ensure the water is not too hot or cold to avoid discomfort.
By gathering these supplies – a soft-bristle toothbrush, non-abrasive denture cleaner, a small bowl, and lukewarm water – you will have everything you need to properly clean your dentures.
Rinse the nightguard
To rinse the nightguard, hold it under running water. This will help to remove any loose debris that may have accumulated on the nightguard. Make sure the water is at a moderate temperature to avoid damaging the nightguard.
Prepare the cleaning solution
To prepare the cleaning solution, we need to mix a denture cleaner with lukewarm water in a small bowl. Follow the instructions on the package for the correct amount of cleaner and water. Stir the mixture thoroughly until the cleaner is completely dissolved.
Soak the nightguard
To ensure proper cleaning, place the nightguard in the cleaning solution, making sure it is fully submerged. This will allow the solution to effectively remove any buildup or bacteria that may be present on the nightguard. Remember to follow the instructions on the cleaning solution packaging for the recommended soaking time.
Scrub the nightguard
To scrub the nightguard, start by using a soft-bristle toothbrush. Gently scrub the surface of the nightguard to remove any stains or buildup. Make sure to cover all areas of the nightguard, including the front, back, and sides. For example, you can use circular motions to scrub the nightguard, applying gentle pressure to ensure thorough cleaning.
Rinse thoroughly
To rinse the nightguard thoroughly, follow these instructions:
- Hold the nightguard under running water.
- Make sure to direct the water onto both the interior and exterior surfaces of the nightguard.
- Rotate the nightguard in your hand to ensure that all areas are thoroughly rinsed.
- Continue rinsing until all traces of the cleaning solution have been removed.
By following these steps, you will ensure that your nightguard is free from any residue, leaving it clean and ready to use.
Inspect for cleanliness
To check the nightguard for any remaining stains or debris, gently inspect the surface. Look closely for any visible stains or debris that may have been missed during the initial cleaning. If you notice any, repeat the cleaning process by using a toothbrush and toothpaste or a denture cleaner to scrub the affected areas. Rinse thoroughly under running water and air dry before using it again.
Dry and store
To properly dry and store the nightguard, follow these steps:
- After removing the nightguard from your mouth, gently pat it dry with a clean towel. This will help remove any excess moisture and prevent the growth of bacteria.
- Find a clean and ventilated container to store the nightguard in. It is important to choose a container that is not airtight, as this can trap moisture and lead to the growth of mold or unpleasant odors.
- Place the nightguard in the container, making sure it is fully dry before storing it. Avoid placing other items on top of the nightguard, as this could cause damage or deformation.
By following these simple steps, you can ensure that your nightguard remains clean, dry, and ready for use whenever you need it.
Keep your nightguard fresh
In conclusion, we have discussed the essential steps for cleaning a nightguard for teeth grinding. By following these guidelines, you can ensure that your nightguard remains hygienic and effective in protecting your teeth. Regular cleaning is crucial to prevent the buildup of bacteria and maintain the longevity of your nightguard. Remember to brush, rinse, and soak your nightguard daily, using the appropriate cleaning solutions. By incorporating these simple practices into your dental routine, you can enjoy a clean and comfortable nightguard while safeguarding your oral health.
Keeping Your Nightguard Fresh
Tips for Properly Using Nightguards for Teeth Grinding
- First, make sure to clean your nightguard thoroughly before using it. Use a mild soap and warm water to gently clean the nightguard, ensuring that all the surfaces are free from any debris or bacteria. Rinse it well and pat it dry with a clean towel
- Before going to bed, ensure that your teeth are clean and free from any food particles. Brush and floss your teeth as you normally would. This will help prevent any bacteria from getting trapped between your teeth and the nightguard, reducing the risk of dental problems
- When inserting the nightguard, make sure it is properly adjusted to fit your teeth. Follow the manufacturer’s instructions or consult your dentist to ensure a correct fit. It should be snug but not too tight, allowing you to comfortably close your mouth without any discomfort. If it feels too tight or uncomfortable, contact your dentist for adjustments
- Wear your nightguard consistently every night, even if you don’t feel the urge to grind your teeth. Teeth grinding can happen unconsciously, so it’s important to protect your teeth every night to prevent damage
- After waking up in the morning, remove the nightguard and clean it again. Rinse it thoroughly to remove any saliva or residue. Store it in a clean, dry container to keep it hygienic until the next use
- Remember, using a nightguard may take some time to get used to, but it can significantly help protect your teeth from the damaging effects of teeth grinding. If you have any concerns or questions, it’s always best to consult with your dentist for personalized guidance
Frequently Asked Questions about Nightguards for Teeth Grinding
Are you interested in hearing about other people’s experiences with nightguards and their effectiveness?
Yes, we are definitely interested in hearing about other people’s experiences with nightguards and how effective they have been for them. We understand that dealing with issues such as teeth grinding or clenching can be quite troublesome and finding the right solution can be challenging. By sharing experiences, we can learn from each other and gain insights into the effectiveness of different approaches. So, if you have any personal experiences or tips regarding nightguards, please feel free to share them with us.
Do you have any specific questions about the potential side effects or risks associated with using nightguards?
We understand that using nightguards may cause some concerns about potential side effects or risks. While nightguards are generally safe to use, there are a few possible side effects that you should be aware of.
One common side effect is temporary discomfort or soreness in the jaw or teeth, especially when you first start using the nightguard. This is usually temporary and should subside as your mouth adjusts to the appliance. However, if the discomfort persists or becomes severe, it’s important to consult your dentist.
In rare cases, some individuals may experience changes in their bite or teeth alignment over time. This can occur if the nightguard is not properly fitted or if it is worn for an extended period without professional guidance. It’s crucial to have your nightguard fitted by a dental professional to ensure it is customized to your mouth and does not cause any unintended issues.
Additionally, wearing a nightguard might increase saliva production or cause a slight change in speech, especially in the initial days of use. These effects are usually temporary and should resolve as your mouth becomes accustomed to the nightguard.
Overall, the benefits of using nightguards to protect your teeth far outweigh the potential risks. However, if you have any specific concerns or questions about your individual circumstances, we recommend consulting with your dentist. They will be able to provide personalized advice and address any further questions you may have.
Have you noticed any symptoms such as jaw pain, headaches, or worn-down teeth?
Yes, we have noticed that experiencing jaw pain, headaches, or worn-down teeth can be symptoms of certain dental conditions. If you are experiencing any of these symptoms, it is important to consult with a dental professional who can properly diagnose and provide appropriate treatment options. It’s always best to address any dental concerns promptly to prevent further complications.
Are you wondering if nightguards can address other related issues such as TMJ disorders or snoring?
Yes, we understand that you may be wondering if nightguards can address other related issues such as TMJ disorders or snoring. While nightguards are primarily designed to protect your teeth from grinding or clenching during sleep, they can also help alleviate symptoms associated with TMJ disorders. By providing a cushion between the upper and lower teeth, nightguards can help reduce the pressure on the temporomandibular joint, providing relief from pain and discomfort.
However, it’s important to note that nightguards may not be a cure-all for TMJ disorders. They can offer temporary relief and help manage symptoms, but it’s always best to consult with a dental professional who can assess your specific condition and recommend the most appropriate treatment plan.
Regarding snoring, nightguards are not typically used as a direct treatment for snoring. Snoring is often caused by a partial blockage of the airway during sleep. However, certain types of nightguards called mandibular advancement devices (MADs) are specifically designed to reposition the jaw and tongue, helping to keep the airway open and reduce snoring.
If you suspect that your snoring may be related to a more serious condition such as sleep apnea, it’s crucial to seek medical advice from a sleep specialist who can provide a proper diagnosis and recommend the most suitable treatment options.
Remember, while nightguards can be helpful for certain issues, it’s always best to consult with a dental or medical professional who can provide personalized advice based on your specific needs.


